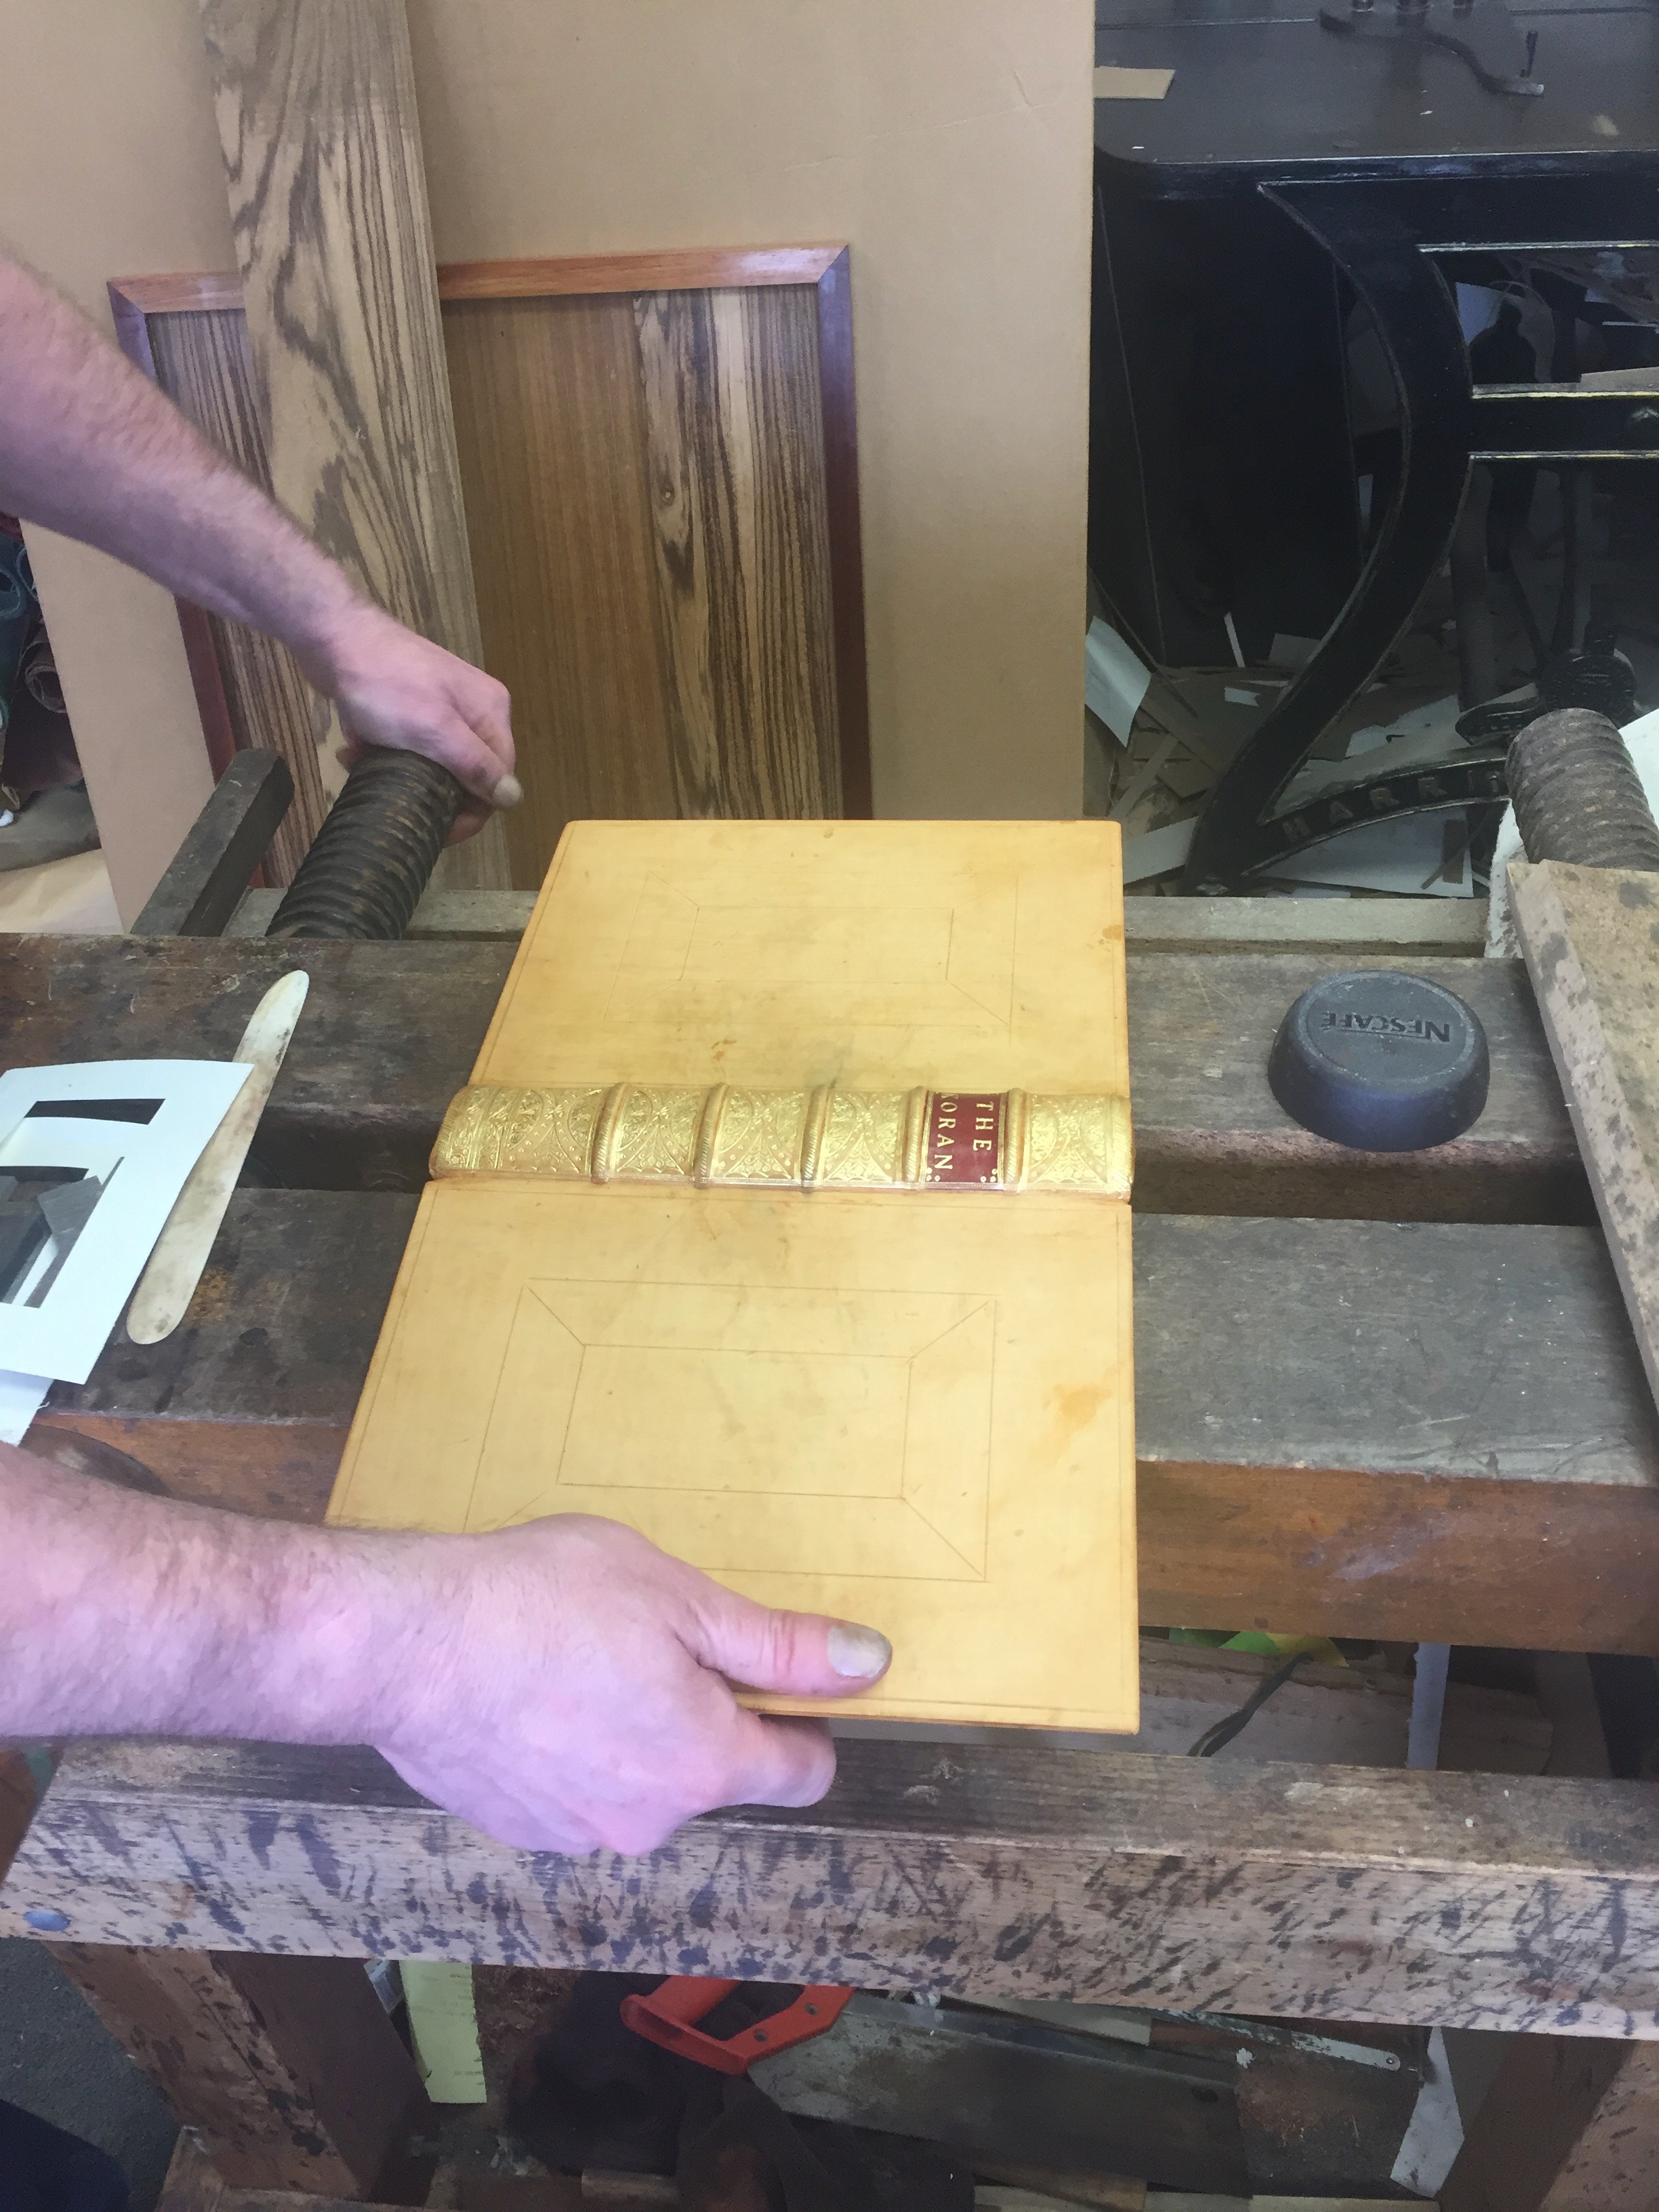
When it comes to displaying antiquarian books, most people picture white-gloved curators in a fancy exhibition hall. They do not tend to imagine grease-covered fingers or paint-splattered worktops, and the notion of deliberately using a hammer on such finely-bound book seems somewhat delusional. Yet the world of book binding is a lot uglier behind the scenes, and the beautiful books on display have undergone some grubby processes before being able to glitter handsomely on display.
Here is a quick glimpse into how to turn a newly rebound book into something shining with pristine yet aching with antiquity:
Greasy Sweat
The natural oil in your hands is good not only for leather rejuvenation, but for picking up delicate gold leaf. The grease acts as temporary glue, giving you enough time to transfer the gold leaf onto the leather without it getting stuck to your hands.
- Work up a light sweat. (Either lift some heavy books, jog on the spot for a while, or put on a warm jumper or two)
- Dab some cotton wool against your forehead. It shouldn’t be damp, only slightly wetted with grease.
- Lightly press the cotton wool onto the gold leaf. It should pick up with the wool.
- Apply the gold leaf to the area of the book you wish to gild. Use the wool to pat it down flat into position.
Dirty Dye
Aniline dyes darken the leather. They dry fairly quickly, but allow dampness to get into the leather. Not only does this make it easier for blind tooling, but it quickly gives any book an antique impression without the need to wait for centuries. This works best for seventeenth and eighteenth century works, which tended to use darker leather.
- Wipe cotton wool to apply the aniline dye evenly to the leather.
- This takes a few minutes to dry.
Compliment it: If you wish to blind tool afterwards, work quickly before the dye dries. This helps the leather get darker where its tooled, for dampness against a hot tool allows the softer leather to be burnt into with a deeper impression.
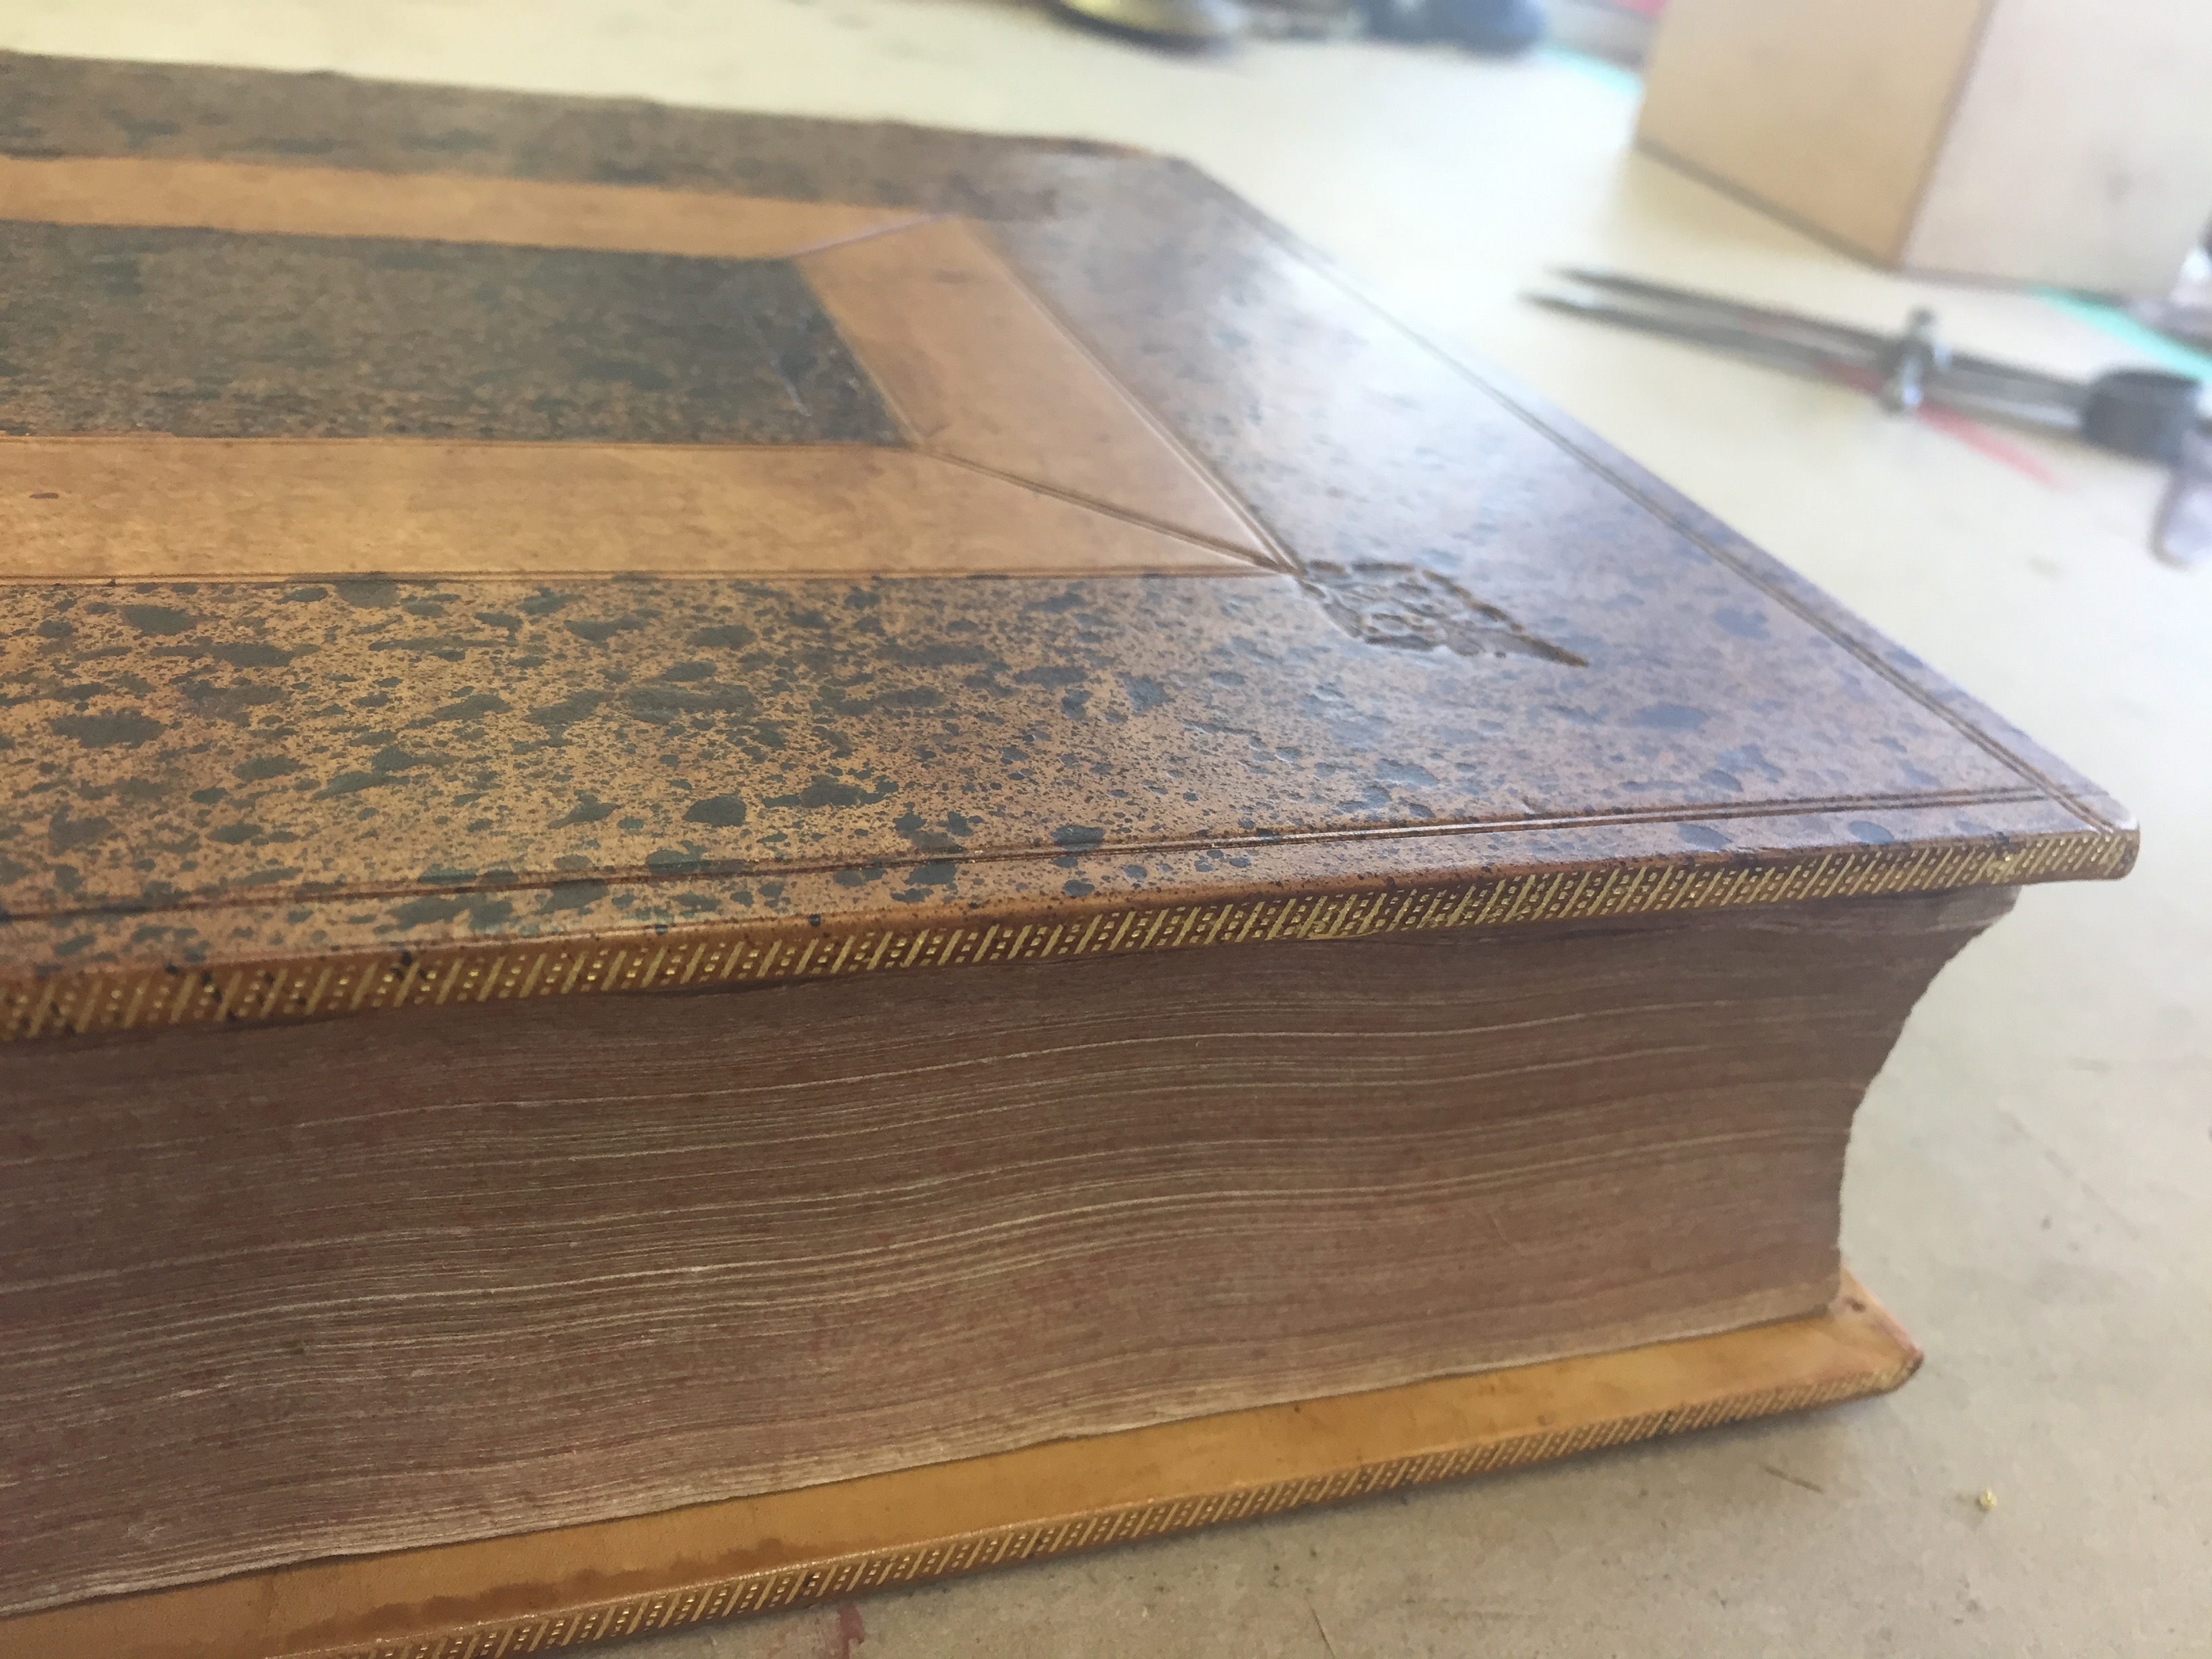
Old Toothbrush.
You’ll use this if you want to create a sprinkling effect. This is decorative but permanent, as the chemicals eat away at the leather. This ages it artificially and simultaneously lends it a contemporary style.
- Dip a toothbrush in ferrous sulphate (liquid iron, found in rusty water) and remove the excess. Spread out the book so that both boards and the spine are as flat as possible.
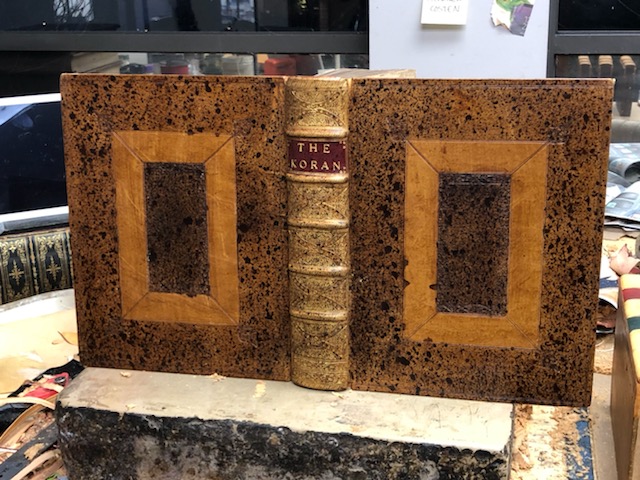
- If you wish to block out any section, cover it in paper weighed down by small table weights. For instance, eighteenth century Cambridge panels tend to have a rectangular section in the centre that is a different shade to the rest of the board.
- Using a wooden stick, scrape the toothbrush bristles over the boards lightly from a height. The iron sprinklings should be evenly applied across the boards and spine: try not to create a localised build-up of staining.
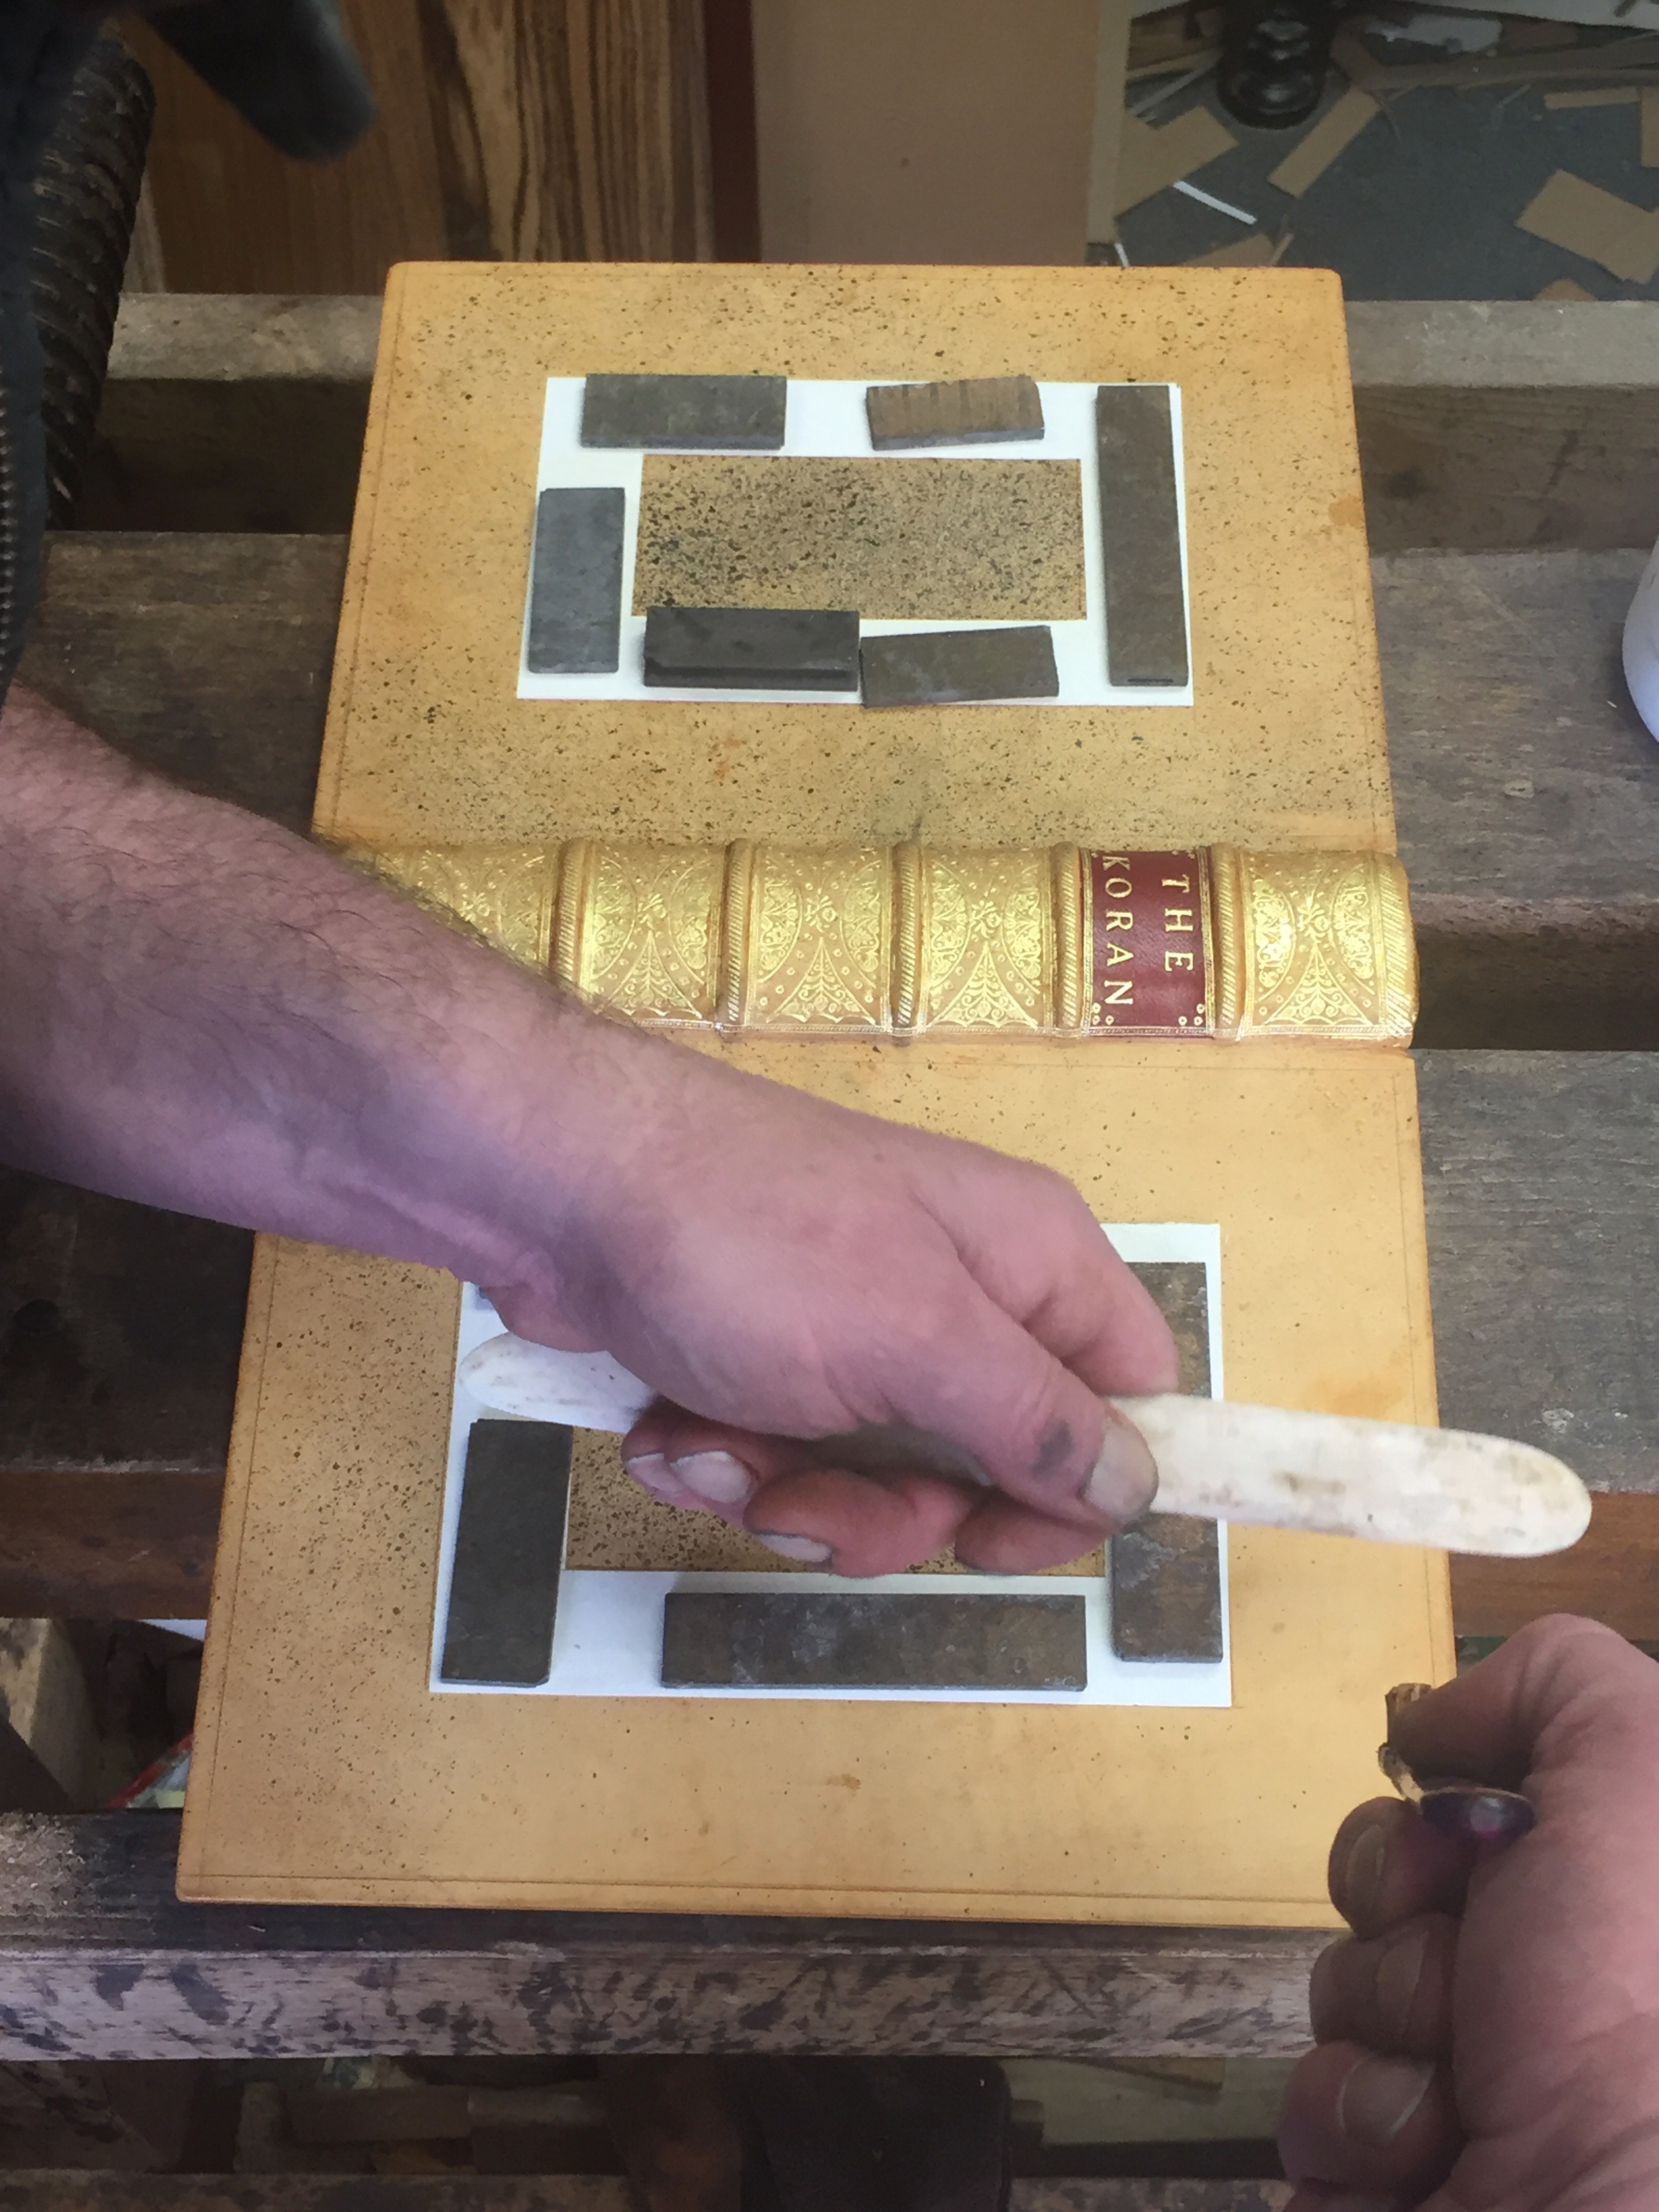
TIP: To avoid the text block from also getting splattered, try putting the book into a press, then placing two large pieces of cardboard underneath the protruding boards.
Compliment it: Repeat the process with potassium carbonate to create an etched blotch in the leather. This is the chemical that eats the leather away.

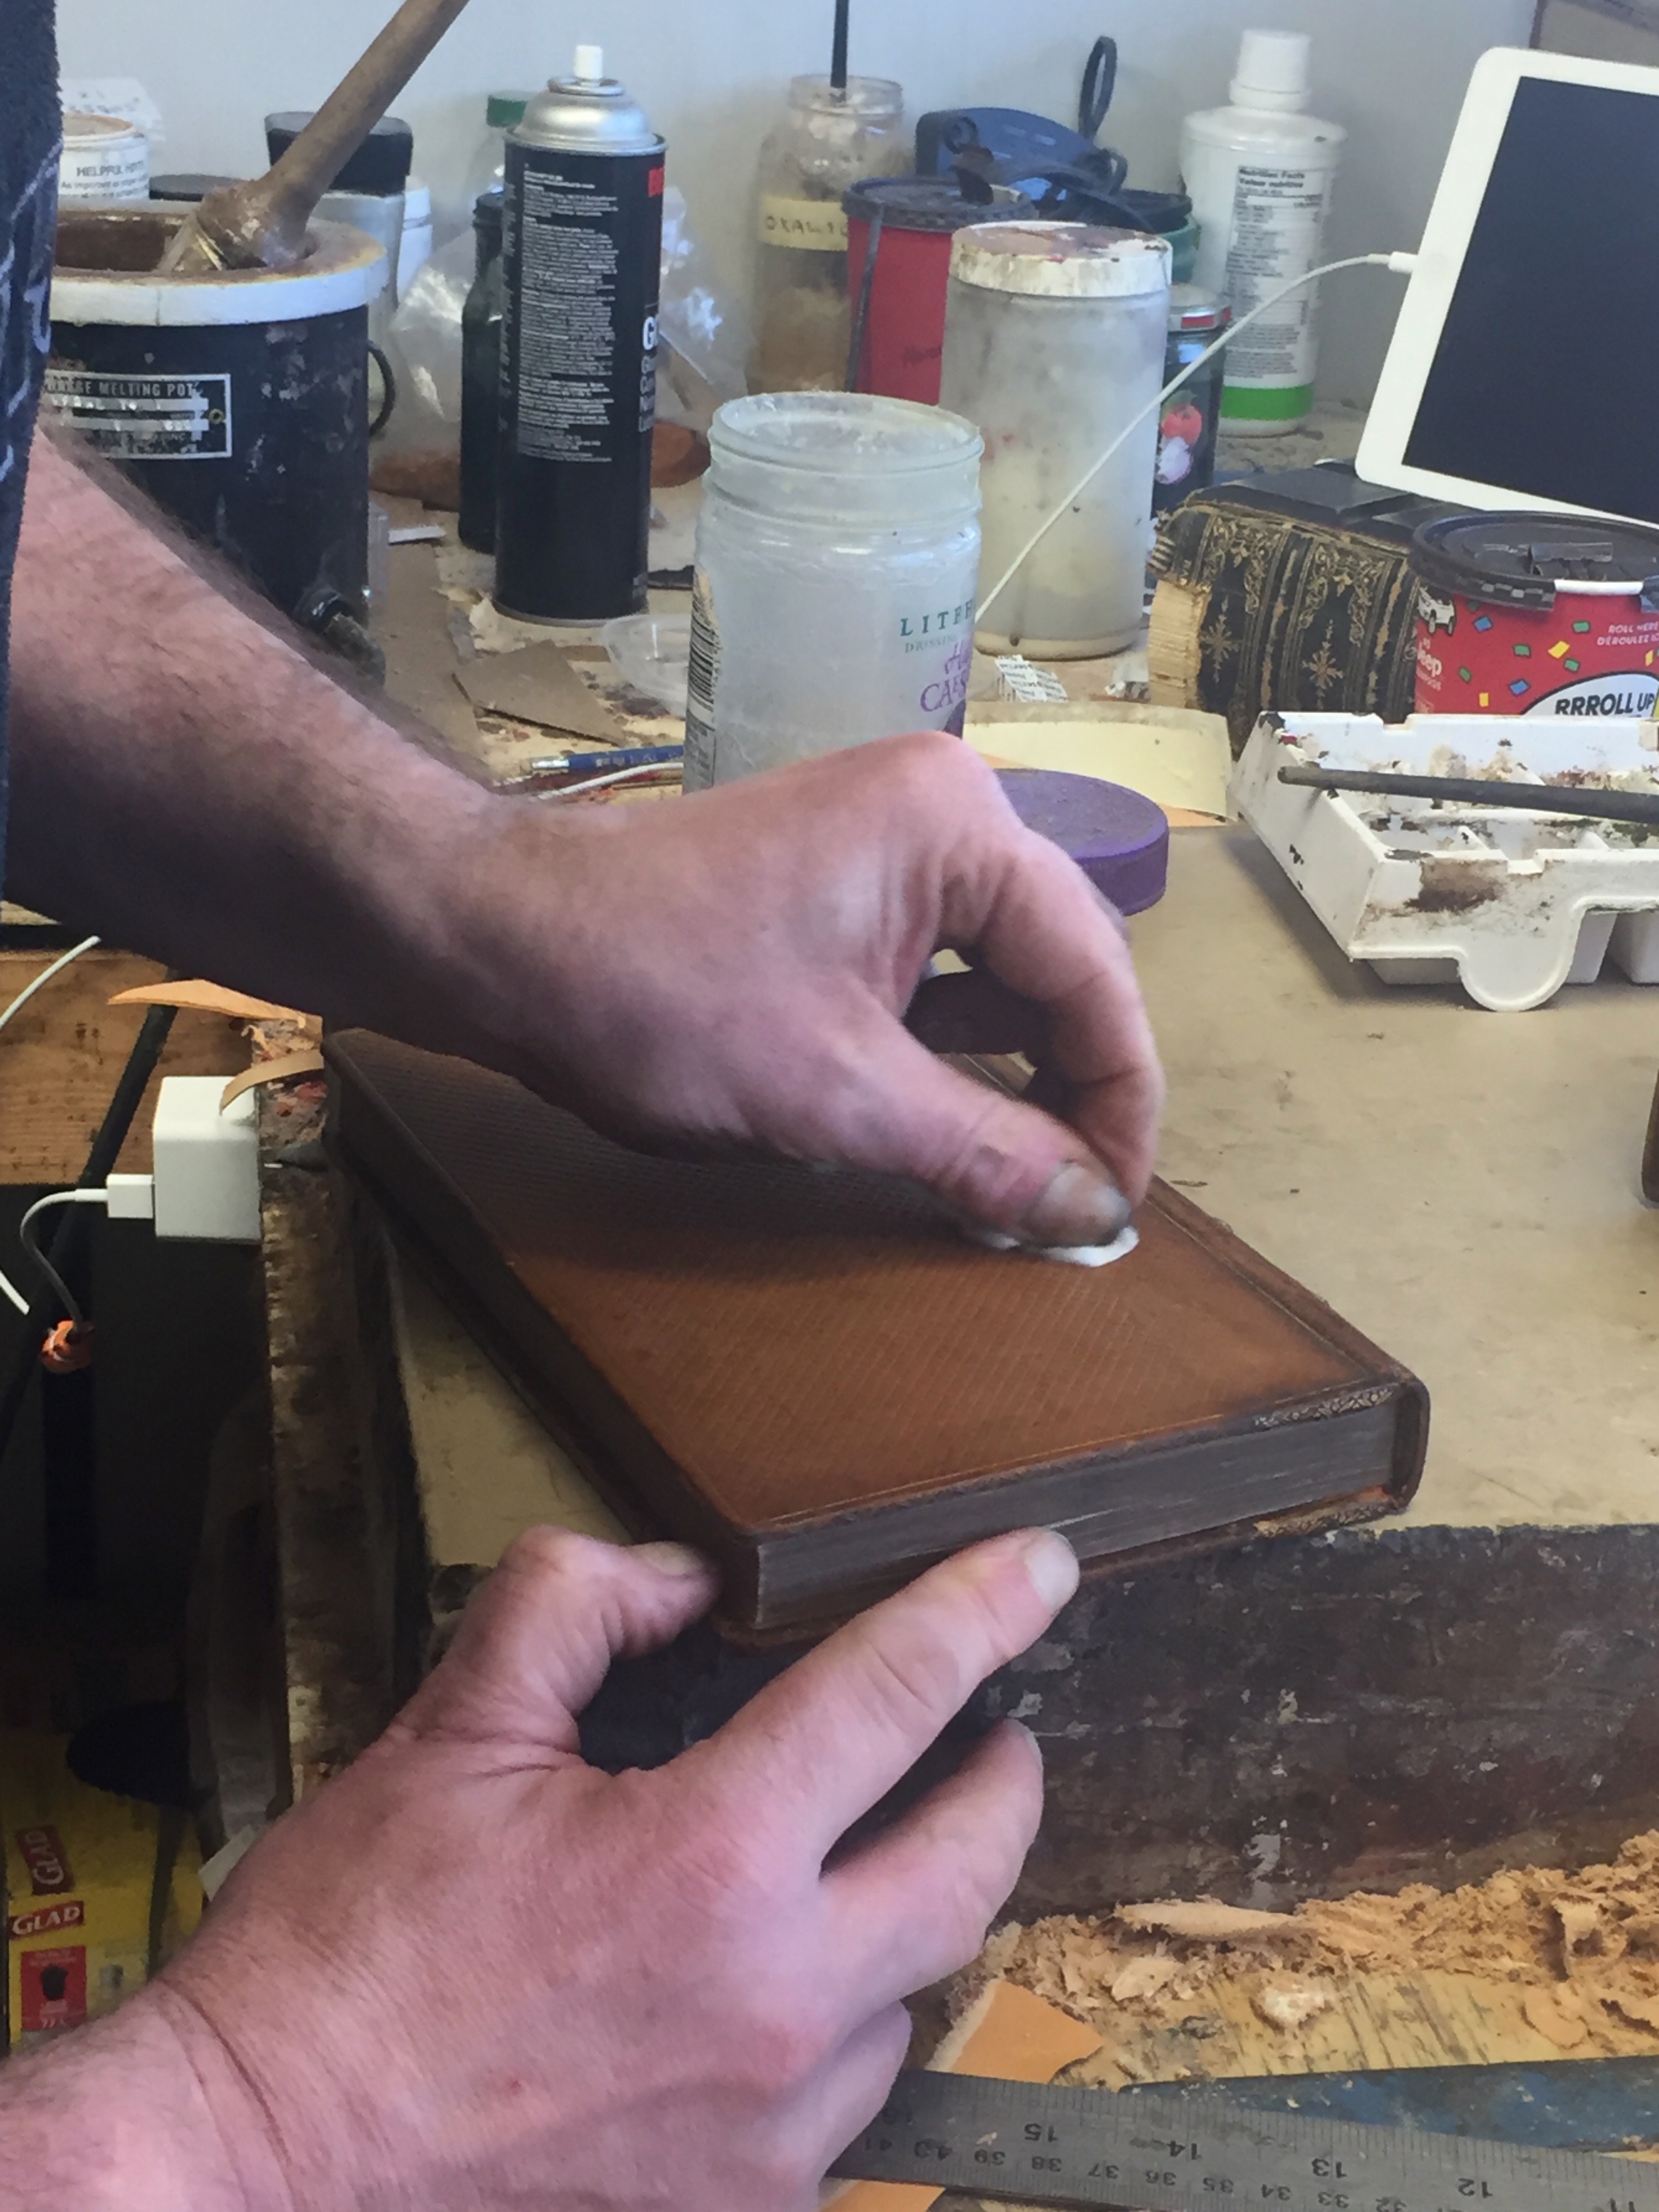
Binder’s Hammer
The corners of old books tend to furl up at the edges, as the leather dries over time and readers handle the books with a less-than-perfect degree of attention and care. To make a book look older than it is, you can bash the edges in to soften the corners.
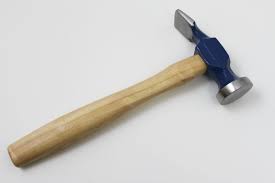
- Take a binder’s hammer. Note: This has a polished edge, so the bog-standard one found in your shed won’t work so well for this trick.
- Perch the book so that the corners are elevated and accessible. You can either hold it if you’re brave, or place it on the very edge of a table.
- With a little pressure, hammer the corners so that they go inwards.
- You can then adjust the angle of the hammer so that the very tip is curled inwards towards the text.
Don’t hammer the edges too enthusiastically though, as this could damage the boards unattractively.
I hope this was useful, and that you’re able to use some of these tips and tricks to get creative with your book binding decoration. Comment below what you think!
